
Introduction to Nessus
Nessus is a widely recognized vulnerability scanning tool that allows organizations to identify vulnerabilities in their networks. It provides comprehensive scanning features and powerful reporting capabilities. Nessus is used by both cybersecurity professionals and malicious hackers to identify potential points of entry into networks.
Installation of Nessus
Nessus is available for various platforms, including Linux and Windows. The installation process might vary depending on the operating system:
Linux Installation
For Linux distributions, you can download the appropriate package from the official Nessus download page and then use the package manager to install it. For example, for Debian-based systems:
sudo dpkg -i Nessus-<version>-debian.deb
After installation, start the Nessus service:
sudo service nessusd start
Windows Installation
For Windows, download the Nessus installer for Windows from the Official Site. Run the installer and follow the on-screen instructions. Once installed, you can start Nessus from the Start Menu or the desktop shortcut.
Using Nessus
Once Nessus is installed and running, you can access its web interface by navigating to:
https://localhost:8834/
From here, you can set up scans, configure policies, and view reports. Nessus offers various scan types, including basic network scans, malware scans, and more advanced policy and compliance scans.
Setting Up a Scan
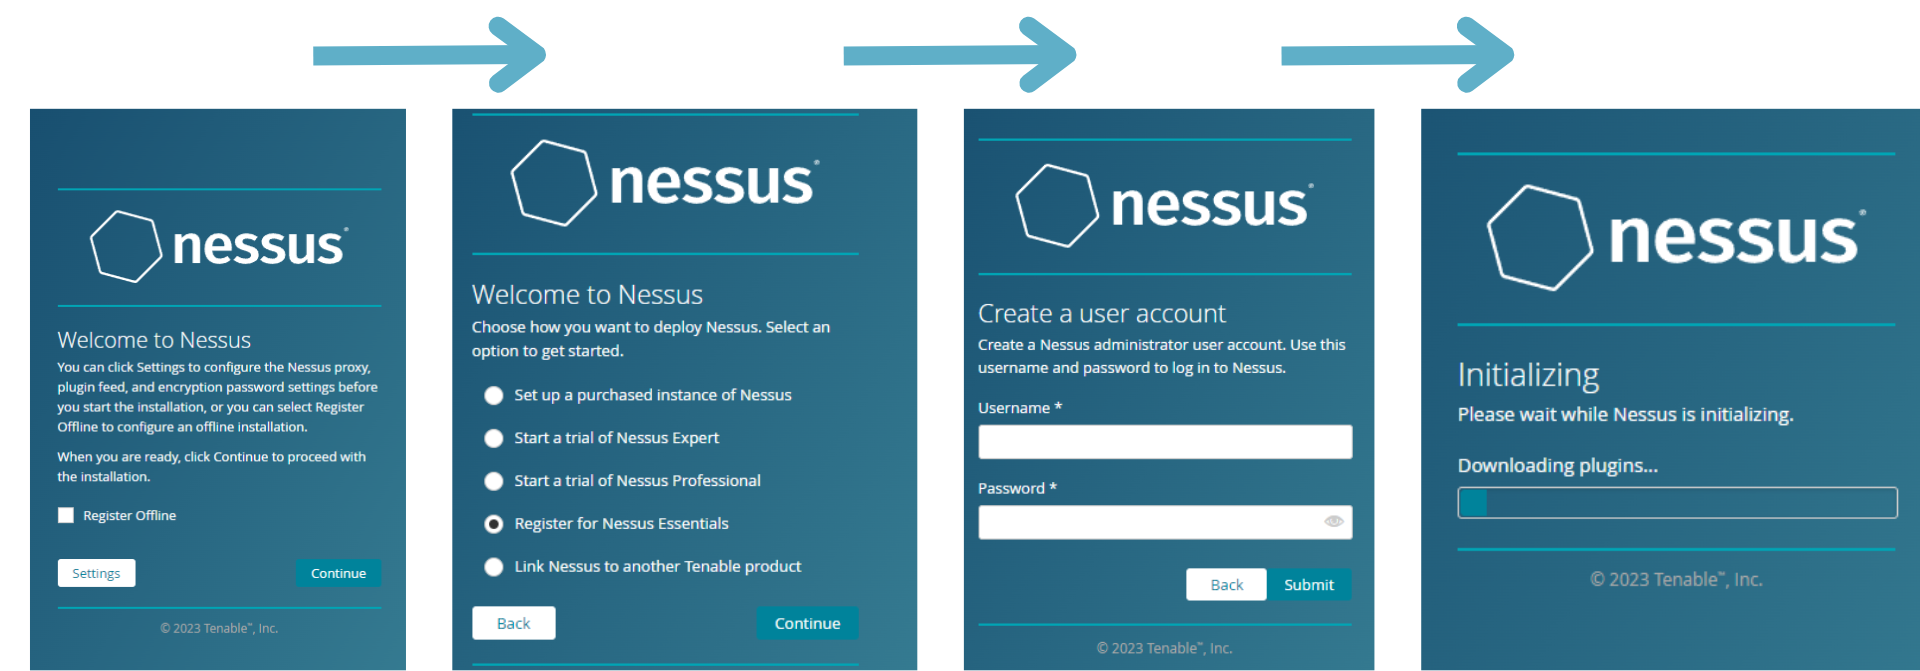
- Log in to the Nessus web interface.
- Follow through with the set-up and activation steps (Be sure to select "Nessus Essentials").
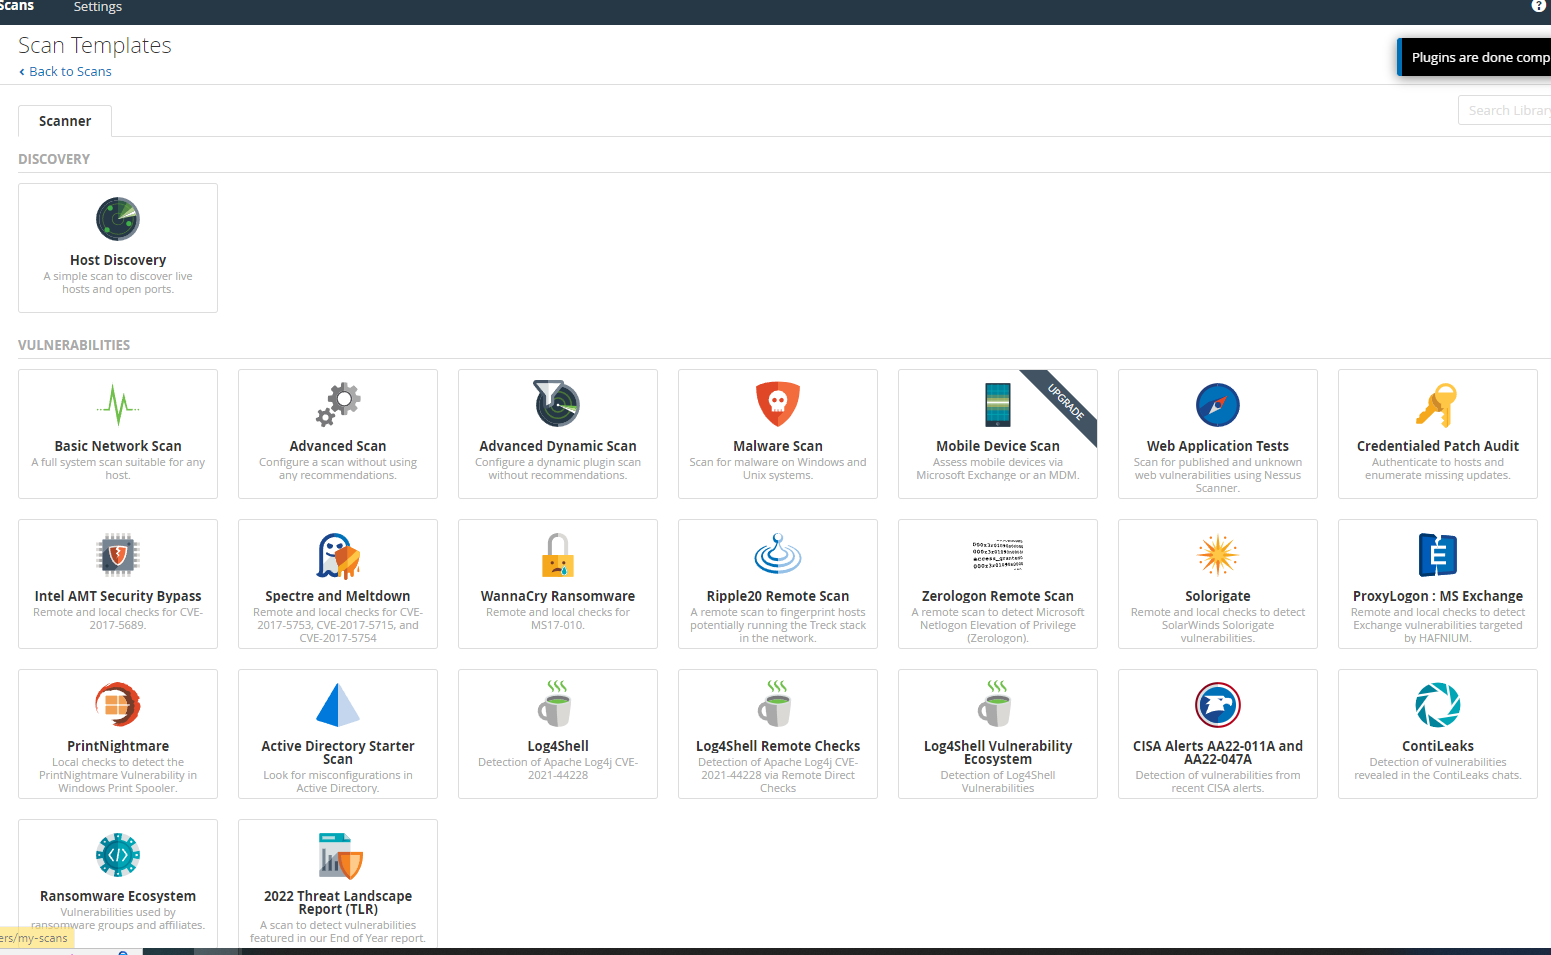
- Click on 'New Scan'.
- Select the desired scan type. For beginners, the "Basic Network Scan" is a good starting point.
- Configure the scan settings:
- Enter a name and description for your scan.
- Specify target IP addresses or ranges. Ensure you have permission to scan these targets.
- Set scan frequency. For regular checks, you can schedule the scan to run at specific intervals.

- Under 'Discovery', choose the type of data you want Nessus to gather. For a comprehensive scan, select 'Port scan (common ports)'.
- Under 'Assessment', select the types of vulnerabilities you want Nessus to check for. If unsure, the default settings are usually sufficient.
- Review the 'Report' settings. Here, you can specify how you want Nessus to present its findings.
- Click 'Save' to save the scan configuration.
- Click 'Launch' to start the scan. Depending on the size of your network and the depth of the scan, this could take anywhere from a few minutes to several hours.
- Once the scan is complete, review the results. Pay close attention to 'Critical' and 'High' vulnerabilities and address them promptly.


Additional Resources
Here are additional video tutorials that provide simple and in-depth guidance on using Nessus